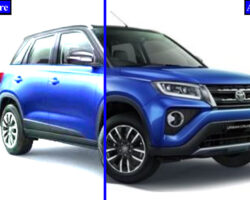
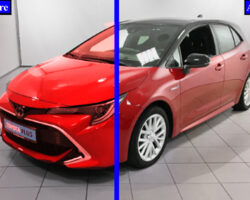
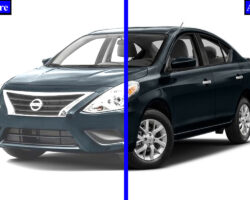
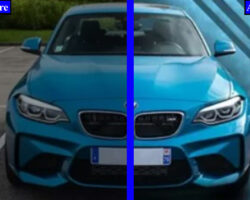
Front end car photo restoration involves enhancing and repairing the front aspect of a vehicle in old or damaged photographs. When images deteriorate or suffer from wear and tear, such restoration techniques can bring back the original appeal and detail of the car’s front end.
This process can include removing scratches, fixing color fading, correcting exposure, and restoring missing parts of the vehicle. By using advanced digital tools and techniques, front end car photo restoration can revitalize vintage or damaged images, preserving both the nostalgic and historic value of the depicted vehicles.
The resulting restored photographs can be used for personal enjoyment, historical documentation, or even promotional purposes.
Understanding Photo Damage Types
Welcome to our comprehensive guide on front-end car photo restoration. In this blog post, we will explore the different types of photo damage that can occur on car images and how to identify them. By understanding these damage types, you will be better equipped to restore your car photos to their former glory. Let’s dive in!
Identifying Scratches, Dents, And Discoloration
When it comes to front-end car photo restoration, it is crucial to accurately identify the different types of damage that can affect your images. Here are the key damage types you need to look out for:
Scratches
Scratches can be a common occurrence in car photos, especially those taken in outdoor settings. These thin lines on the surface of the image can disrupt the overall aesthetic and need to be carefully addressed during the restoration process. Identifying scratches is relatively straightforward, as they appear as linear marks or streaks across the photo.
Dents
Dents are another type of damage that can be visible in car photos. These depressions on the surface of the image can result from physical impacts or other factors. Dents are usually characterized by their concave appearance, which creates a noticeable indentation on the car’s body. Detecting dents can help you determine the extent of restoration required for your front-end car photo.
Discoloration
Discoloration refers to the alteration of colors in a photo, which can make the image appear faded or distorted. This damage type can commonly affect old car photos or those exposed to unfavorable conditions.
Look out for any noticeable changes in color saturation, shifts in hues, or uneven tone distribution across the image. Identifying discoloration will help you prioritize color correction techniques during the restoration process.
Photo Aging: Fading Colors And Dulled Details
Photo aging is a natural process that occurs over time, resulting in fading colors and dull details. Understanding the effects of photoaging is essential when restoring front-end car photos. Let’s take a closer look:
Fading Colors
Fading colors can significantly impact the visual impact of a car photo. Over time, exposure to light, heat, and other environmental factors can cause colors to lose their vibrancy.
When restoring your front-end car photos, pay attention to any signs of color fading, such as washed-out or pale hues. Restoring the original brightness and saturation of colors will enhance the overall quality of your images.
Dulled Details
Photo aging can also lead to dulled details, where fine elements and textures in the image become less distinct. This loss of detail can affect the overall sharpness and clarity of your front-end car photos.
Identifying dulled details involves looking for any blurriness or muddled areas that compromise the image’s level of detail. Enhancing these details during the restoration process will bring back the visual intricacies that make your car photos stand out.
Now that you have a better understanding of photo damage types like scratches, dents, discoloration, fading colors, and dulled details, you can effectively assess the condition of your front-end car photos.
Identifying these damage types is the first step toward achieving stunning results during the restoration process. Stay tuned for our upcoming blog posts, where we will delve into various restoration techniques and best practices.
Preparing For Restoration Work
When it comes to front-end car photo restoration, proper preparation is the key to achieving exceptional results. The initial steps taken during this stage will greatly influence the quality of the final outcome.
In this service, we will explore the important aspects of preparing for restoration work, including selecting the right software and tools, setting up a conducive work environment, and digital scanning and image-importing tips. By following these guidelines, you can ensure a smooth and efficient restoration process that will breathe new life into your precious car photographs.
Selecting The Right Software And Tools
To restore car photos effectively, it is crucial to select the right software and tools. Consider using powerful photo editing software such as Adobe Photoshop, as it offers a wide range of features specifically designed for advanced photo restoration. With its arsenal of tools and capabilities, Photoshop enables you to remove blemishes, adjust colors, and enhance details with precision and ease.
Specialized tools like cloning, healing brushes, and content-aware fill can significantly contribute to restoring faded or damaged areas of the image. These tools allow you to repair scratches, remove unwanted objects, and seamlessly blend in missing portions, giving your car photos a refreshed and polished appearance.
Setting Up A Conducive Work Environment
Creating a conducive work environment is essential for the restoration process. Here are some key elements to consider:
- Proper lighting: Ensure your workspace is well-lit to accurately assess and retouch the photographs. Natural lighting or a combination of ambient and artificial light sources can provide optimal conditions for precise restoration work.
- Ergonomic setup: Arrange your workstation in an ergonomic manner, promoting comfort and efficiency during long hours of editing. Invest in a comfortable chair, position your monitor at eye level, and use an adjustable desk to avoid strain and fatigue.
- Organized workspace: Keep your tools and reference materials organized and easily accessible. This will save you valuable time and enable you to swiftly switch between different tasks without disruptions.
- Uninterrupted work environment: Minimize distractions by ensuring a quiet and peaceful workspace. Inform your colleagues and family about your dedicated restoration time to avoid interruptions that may compromise your focus and concentration.
- Backup system: Implement a reliable backup system to protect your priceless car photos from accidental loss or damage. Regularly save your work on external storage devices or cloud-based platforms to prevent any unfortunate data loss incidents.
Digital Scanning And Image Importing Tips
When restoring car photos, digital scanning and proper image importing techniques are paramount. Here are some tips to ensure optimal results:
- High-resolution scanning: Use a high-quality scanner capable of capturing detailed images at a high resolution. This will provide you with more information to work with during the restoration process, resulting in sharper and more vibrant car photos.
- Keep original photos intact: Whenever possible, avoid handling fragile or delicate car photographs excessively. Instead, use a clean, flatbed scanner to create a digital copy, preserving the original image for future reference.
- Use RAW format: Whenever feasible, save your scanned or imported images in RAW format. The RAW format retains all the original image data and allows for more advanced adjustments during the editing process, ensuring maximum flexibility and control.
- Organize your file structure: Develop a consistent and logical file-naming system to keep track of your digital car photos. Properly organizing your files will save you from frustration and confusion in the long run, enabling faster access to specific images.
- Metadata preservation: Preserve important metadata, such as date, location, and photographer, by using appropriate image importing techniques. This will help you maintain the historical integrity of the car photographs and provide valuable information for future reference.

Repairing Damaged Areas
Restore the beauty of your car’s damaged front end with our photo restoration services. Our expert team will carefully repair and enhance the affected areas, leaving your car looking as good as new.
When it comes to front end car photo restoration, one of the key aspects is repairing damaged areas. Whether it’s scratches, dents, or even missing parts, these imperfections can significantly affect the overall look of the vehicle in the photograph. With the advancements in photo editing tools, it is possible to seamlessly repair these damaged areas, leaving behind a photo that looks as good as new.
Using Cloning And Healing Tools
One of the most important techniques in repairing damaged areas of a front end car photo is using cloning and healing tools. These tools are designed to remove imperfections by copying pixels from a nearby area and blending them seamlessly into the damaged part.
By carefully selecting the cloning source and adjusting the brush size, skilled photo editors can make scratches, dents, and even minor accidents disappear.
The cloning tool is perfect for repairing small imperfections such as scratches. By selecting an area with similar color and texture and then copying it over the damaged area, the scratch can be effectively concealed. However, it’s crucial to ensure that the cloned area matches the surroundings to avoid any signs of tampering.
As for healing tools, they are excellent for fixing more complex issues such as dents or missing parts. The healing brush tool, for example, works by blending the colors and textures of the source area with the affected area. This seamless blending ensures that any signs of repair are practically invisible, resulting in a photo that looks impeccable.
Matching Textures And Patterns
Another critical aspect of repairing damaged areas in front end car photo restoration is matching textures and patterns. When restoring a vehicle, it’s essential to ensure that the repaired area seamlessly integrates with the rest of the car’s surface. This involves matching not only the color but also the texture and pattern of the surrounding areas.
To achieve a perfect match, photo editors often utilize various techniques such as adjusting the brightness, contrast, and saturation levels to create a consistent look.
They may also use the stamp tool to replicate specific patterns or textures found elsewhere in the image. By paying attention to these details, the repaired area won’t stick out from the rest of the car, resulting in a flawlessly restored photograph.
In conclusion, repairing damaged areas is a crucial step in front end car photo restoration. Skillfully using cloning and healing tools and paying close attention to matching textures and patterns are key to achieving a high-quality and seamless result.
By employing these techniques, photo editors can transform a damaged car photo into a perfectly restored image, preserving the beauty and authenticity of the vehicle.
Restoring Original Colors
Restoring the original colors of old or damaged car photos is a crucial step in front-end car photo restoration. Over time, photographs can fade, lose vibrancy, or suffer from discoloration. However, with the right techniques and attention to detail, it’s possible to bring back the original colors and make those vintage car photos shine once again.
Balancing Color Levels
One of the primary techniques for restoring original colors is by balancing the color levels in the photo. This method involves adjusting the brightness, contrast, saturation, and color balance to achieve a natural and visually appealing result.
To begin, the photo can be analyzed to identify the areas that need color correction. Once identified, the color levels in these areas can be adjusted using various tools available in photo editing software.
For instance, the brightness can be adjusted to ensure that the photo is neither too dark nor too bright. Her contrast can be tweaked to enhance the separation between light and dark areas, resulting in a more dynamic and vivid image.
Saturation levels can be adjusted to control the intensity of colors in the photo. This is particularly useful in cases where the colors have faded or become dull. By increasing the saturation, the vibrancy and richness of the original colors can be restored, breathing new life into the photo.
In addition to these adjustments, the color balance can be fine-tuned to ensure that the photo accurately represents the actual colors of the car. Sometimes, old photographs tend to have a color cast, such as a yellowish or bluish tint.
Correcting this color cast is essential to bring back the true colors of the car. By adjusting the color balance, the photo can be restored to its original colors, making it look authentic and visually captivating.
Techniques For Color Correction
When it comes to color correction, there are various techniques that can be employed to achieve the desired result. Some of these techniques include:
- Curves Adjustment: This technique allows for precise control over the tonal range of the photo. By adjusting the curves, the highlights, shadows, and midtones can be modified to enhance the colors and achieve the desired look.
- Selective Color Correction: This technique involves targeting specific colors in the photo and adjusting their hue, saturation, and luminance individually. It allows for targeted color correction, making it easier to address any color imbalances or inconsistencies.
- Color Replacement: In some cases, the original colors may be completely lost or damaged beyond repair. In such situations, color replacement techniques can be used to recreate the colors based on reference images or descriptions. This technique involves manually selecting and replacing colors, ensuring that the new colors blend seamlessly with the rest of the photo.
By utilizing these techniques and paying attention to the details, front-end car photo restoration professionals can breathe new life into old and damaged car photos, bringing back the vibrant and authentic colors that make these vintage images truly special.
Refining Details And Sharpness
Refining details and enhancing sharpness are essential for front-end car photo restoration. Our expert team ensures meticulous attention to detail, resulting in crisp and vibrant images that capture the true essence of your vehicle.
Enhancing Edges And Fine Lines
One of the key aspects of front-end car photo restoration is refining details and sharpness. A major part of this process involves enhancing the edges and fine lines of the car in the image. By carefully adjusting the contrast and clarity, we can make these lines more defined and sharper, resulting in a cleaner and more professional-looking photo.
We employ advanced techniques that allow us to isolate the edges and fine lines from the rest of the image. By selecting specific areas and applying appropriate adjustments, we can enhance their sharpness and make them stand out.
This meticulous process helps restore the intricate details of the car, such as the curves of the body, the contours of the headlights, and the edges of its distinctive features.
Adding Depth With Shadows And Highlights
In addition to refining edges and lines, another important aspect of front-end car photo restoration is adding depth to the image. We do this by strategically manipulating shadows and highlights to bring out the car’s three-dimensional appearance.
By carefully adjusting the shadow and highlight areas, we can create a sense of depth and dimensionality. Shadows help add depth to the car’s body, while highlights can make certain parts, like chrome accents or glossy surfaces, pop.
This technique gives the photo a realistic and dynamic look, as if the car is ready to drive off the screen and into reality.
Through a combination of artistic expertise and technological know-how, we ensure that each restored car photo captures the essence of the vehicle, emphasizing its unique features and making it appear as captivating as it is in person.
Preserving Restored Photos
Once you have invested time and effort into restoring your precious car photos, it is crucial to preserve them properly to maintain their integrity. Preserving restored photos will not only help you enjoy them for years to come but also ensure that future generations can appreciate the beauty and history captured in these images.
Best Practices For Saving Restored Images
When it comes to saving your restored car photos, following these best practices will help you maintain their quality and prevent any potential damages:
- Use high-quality file formats: Saving your photos in a lossless file format such as PNG or TIFF will preserve the details and ensure there is no loss in image quality. These formats are especially suitable for photos that have undergone extensive restoration.
- Choose the right resolution: Ensure that your saved images have a resolution of at least 300 dots per inch (DPI) to ensure a crisp and clear print. Higher resolution versions can always be scaled down, but scaling up can lead to a degradation in quality.
- Organize and label your files: Implementing a consistent file naming and organizing system will make it easier to locate and retrieve your restored photos in the future. Adding relevant metadata, such as the year, location, and car model, can also provide valuable context.
- Backup your files: It is crucial to create backup copies of your restored images to protect against data loss. Consider saving them on external hard drives, cloud storage platforms, or both. This redundancy will ensure that your hard work is not lost in case of accidents or hardware failures.
Recommendations For Printing Restored Photos
Printing your restored car photos can bring them to life, allowing you to showcase these cherished memories in various ways. Here are some recommendations to ensure the best possible outcome when printing:
- Choose a reputable printing service: Entrust your restored photos to a professional printing service that specializes in high-quality photo reproduction. They will have the expertise, equipment, and materials to produce stunning prints that showcase the meticulous restoration work.
- Select the right paper: The choice of paper can significantly impact the final look and feel of your printed photos. Opt for acid-free, archival-grade paper to ensure longevity, color accuracy, and resistance to fading over time.
- Consider framing options: Frame your printed photos to protect them from dust, sunlight, and physical damage. Choose frames that complement the style and aesthetic of your restored images, enhancing their overall presentation.
- Display and store with care: When showcasing your printed photos, avoid direct sunlight and areas with high humidity. Additionally, use acid-free photo albums or archival sleeves to protect them from fingerprints, moisture, and other potential hazards.
By following these best practices for saving restored images and implementing the recommended printing techniques, you can preserve your car photos in their restored glory for years to come. Take the time to safeguard these valuable memories and share them with future generations to keep the history of these extraordinary vehicles alive.
Frequently Asked Questions (FAQs)
What Is Front End Car Photo Restoration?
Front end car photo restoration is a process of enhancing the appearance of a car’s front end in a photograph, removing imperfections, and improving its overall visual appeal.
Why Is Front End Car Photo Restoration Important?
Front end car photo restoration enhances the car’s aesthetic appeal, making it more visually appealing for marketing, advertising, or personal use.
How Does Front End Car Photo Restoration Work?
Front end car photo restoration involves using advanced editing techniques to remove scratches, dents, and other imperfections from the car’s front end in a photograph, resulting in a flawless representation.
What Are The Benefits Of Front End Car Photo Restoration?
Front end car photo restoration allows car owners to showcase their vehicles in the best possible light, attracting potential buyers or admirers.
Can I Do Front End Car Photo Restoration Myself?
While it is possible to try and restore car photos on your own, professional photo editing services ensure high-quality results with their expertise and advanced software.
How Much Does Front End Car Photo Restoration Cost?
The cost of front end car photo restoration varies depending on the complexity of the job, with professional services typically charging a reasonable fee for their expertise.
Where Can I Find Professional Front End Car Photo Restoration Services?
You can find professional front end car photo restoration services through online platforms, photography forums, or by searching for reputable photo editing companies.
How Long Does It Take To Complete Front End Car Photo Restoration?
The time required to complete front end car photo restoration depends on the complexity of the project and the workload of the editing service. Typically, it can take a few hours to a few days.
What Software Is Used For Front End Car Photo Restoration?
Professional photo editing software such as Adobe Photoshop is commonly used for front end car photo restoration due to its advanced tools and capabilities.
Is Front End Car Photo Restoration Suitable For Vintage Cars?
Yes, front end car photo restoration is suitable for vintage cars as it can revitalize their appearance, bringing them back to their original glory in photographs.
Conclusion
Front end car photo restoration is a highly beneficial process that can dramatically improve the appearance of vintage or damaged vehicle images. By utilizing advanced digital technology and skilled restoration techniques, professionals can revive old photos and bring them back to life.
Whether you are a car enthusiast, a collector, or someone who wants to preserve a piece of history, this restoration process offers a remarkable opportunity to rejuvenate and cherish these precious memories for future generations.


